Sunday, November 30, 2008

Feather Fan Process

Here is a short explanation of the process for making a Flat Feather Fan.


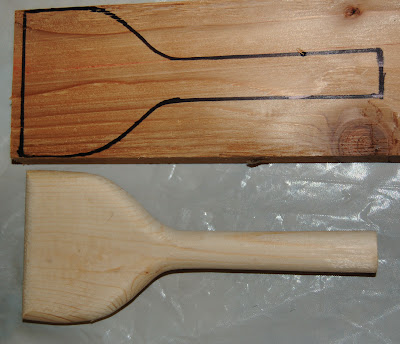
Take a Cedar board, 3 Inches wide by 1 inch thick and mark a pattern on it as shown in photo.


Next step is to cut the pattern out and then using a wood rasp and files, shape it, then sand smooth.


Next step is to cover it with soft thin leather to bead on.

I then use a beading stitch called "Peyote Stitch" which consists of anchoring the first bead on

the string to the leather, after which you skip a bead and add a bead till you get all the way around.


After that you add a bead every time you come to a lower bead...one bead at a time and create your pattern by count.


I will add Photographs as the beading progresses and until the Fan is completed.

It takes about two to three weeks of beading to complete the handle.


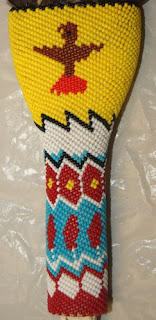
See below examples of the layout of the handle, shape of handle, and beading.


Example of Handle Layout


Handle Cut Out , Shaped and Sanded


Example Of Beaded Lower Part Of Handle

Friday, November 28, 2008

"Artist's Guilt"

The Subject today is "Artist's Guilt". Now you may ask, what in the world is he talking about ?.

As an Artist I feel I must be creative Every day, but sometimes I take the day off and just
mess around or rest, but there is that nagging feeling of guilt that I am not out in my workshop
working and creating something new or continuing on with the current project.

Why is this the "Curse" of the Artist ?

Is it that we must constantly be creating ? Is it the feeling that "Idle Hands are the Devils Workshop" ?. What brings on these feelings? Is it our upbringing ?, or just the crazy mind of an Artist ?

Do any of the rest of you get these feelings, or am I alone in this ?

I for one have a constant feeling of "Guilt" if I am not doing something "Artistic "all the time.

We, Elisabeth and I, took the day off from "Art" yesterday and had a day of "Companionship".
We together prepared a Thanksgiving meal and sat down together to enjoy it after we had prepared it and then just mostly just sat around and talked and I played on the computer
playing some games ( Casino Games ) and she played with some Art Journals .
But I still had that "Guilty" feeling all day that I was not out in the shop continuing the beading on that new Feather Fan Handle that I am in the process of completing.

I think I may take a few pictures of the "Process" of doing a Feather Fan from start to finish and maybe share it with my friends and followers. What do you think?..Would anyone be interested in seeing that ?

"Create, Create, Create" My thoughts for today.

Tuesday, November 25, 2008

" Great Blue Heron Gourd"

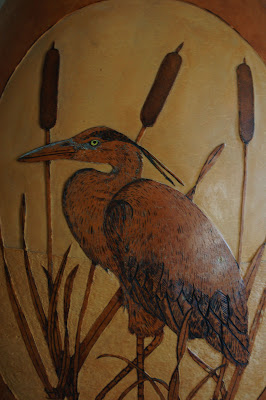
" Great Blue Heron" Gourd Art

I would like to show you a challenging piece I did some time ago, and tell you a little about it here and show you a few photographs of it.

This is one of my gourds that I grew , a large bottle gourd and one of the thickest gourdsI have ever seen or grown.

After the end of the season and after the first Hard frost , I cut the vine loose from the gourd leaving a piece of the vine attached to the top and placed the gourds on a wooden pallet out in the garden to dry over the winter. As winter goes on I go out to the pallets every few days and turn the gourds so that they dry evenly and air can circulate around the entire gourd. Gourds dry out thru the hard shell and also the stem left on the gourd. The gourds sweat out the moisture that is inside and sluff off the waxy skin that covers the outside, thus exposing the hard outer shell. The gourds also get moldy and mildewed on the outside as they dry out, which has to be washed and scrubbed off when they are fully dry, I do this by placing them in a big tub of water with some bleach in it and let them soak for about 20 to 30 minutes, then use a stainless steel kitchen pot scrubber to scrub off any remaining waxy skin and the mold and mildew and it leaves a nice clean hard shell surface with some patterning from the mold and mildew.

I drew on the shape of the cutout for the top and proceeded to cut it out in a patterned shape, after which I cleaned out all the inner membranes and seeds that are inside and then scraped and sanded the inside clean and smooth. I then drew on all borders near the top and wood burned in the cutout pattern. Next it was time to draw on the Great Blue Heron and cattails and boarder the drawing with an oval shape.

Next step was to wood burn in all the bordering, the Heron and cattails. After all the wood burning was done, I next carved away all the hard shell of the gourd from around the Heron and cattails and left the water area with some roughness to assimilate moving water and above the water line, I sanded smooth all the carved area within the oval. The carved area is about 1/16 of an inch deep, thus leaving the Heron and cattails standing in relief.

The next step was to use a light brown leather dye over the whole hard gourd shell and use some leather dyes on the Heron and cattails, such as a bit of shading at the base of the cattails and the legs of the Heron and some on the Heron it self.

The Gourd stands 20 1/2 inches tall with the top on and is 11 inches wide and sits on a steam bent ring that is 2 1/2 inches tall and 10 inches wide.


Note: The gourd after cleaning out and sanding smooth inside is still a full 1/2 inch thick.


Gourd With Top Off


Close Up Of Heron


A closer view of Heron

" Clouds "


Morning Clouds


I took this photograph a few weeks ago and just had to share it with my friends and followers.


There appeared in the sky early one morning the most amazing cloud patterns I have ever seen ,

with the exception of a Tornado forming or a massive Thunder Storm.


I never cease to be amazed at what beauty can form in the sky and the various views that can be seen at different places in the sky at the same time.


Please see below two more pictures of the same sky from a different view.....simply amazing isn't it?


Amazing cloud patterns


More of The Same

Sunday, November 23, 2008

"Morning Glory's and Squash Blossoms"


Morning Glory Field

This year was our Seventh year of drought here in the North Carolina mountains.

We have a 3/4 acre garden plot where I grow veggies and gourds ....or I should say " I TRY "
to grow things....however the past seven years of drought have made it quite a task with any growth.

Labor intensive hand watering did produce a few stunted products, but the Gourd Crop was a total failure again this year....if my supply keeps dwindling..I will have to start buying gourds to continue my Gourd Art.

Regardless of the drought, some things will grow every where you don't want them to grow, like Weeds..... and the very invasive Morning Glory. This wonderful blooming flower with it's massive spread of vines took over the whole upper portion of the garden and produced the most spectacular blanket of blooms I have ever seen.

Look at the photograph above to see just a bit of what I am talking about.

Now.....I am going to put in for our viewing pleasure, some close up shots of the different Morning Glory's that grew there...... Oh yes...I couldn't resist putting in One shot of a bee in a Squash Blossom that managed to grow in that sea of Morning Glory's.


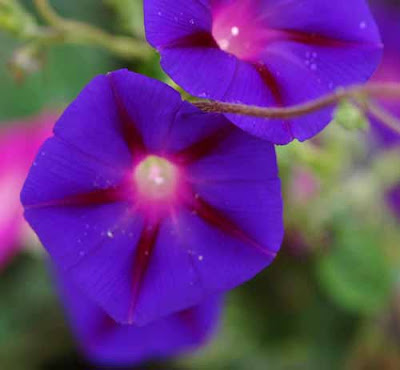
Wonderful Blue Flower


"Just a bit closer please"


Another of Natures Wonders

Apache Squash Blossom With Bee

Saturday, November 22, 2008

"Cougar Gourd Art"

Front View


This is one of my Gourds that I grow for my Gourd Art.


I chose this nice gourd for it's shape and thickness and after cutting out the top, cleaned out


the inside and sanded it smooth, then I proceeded with the layout of the art.


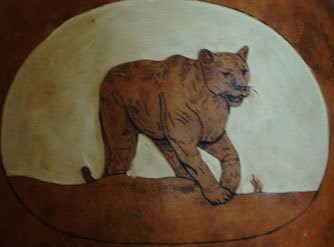
I first sketched on the boarders of the top and panels for the Cougars. Next step was to draw on


the Cougars on the front and the back side with pencil, then wood burn in each portrait.


Next I decided to carve away the area surrounding the upper portion of the Cougar picture and sand that area smooth, leaving it the natural color of the gourd under it's hard shell.


I repeated this process with the Cougar on the back of the gourd and used leather dyes for colors.


Below I will show close up pictures of the Cougars as they appear on the gourd.


Shown With Top Off


Close Up Of Front Panel


Close Up Of Rear Panel

Thursday, November 20, 2008

"Eagle Gourd"


One of My Favorite Gourds I made


Close Up Of Front Panel

Close Up Of Another Panel


Close Up another Panel....Eagle Head


Close Up Of Fourth and Final Panel

My love of Eagles and my Native American name of Eaglesbrother,

was my inspiration for this Gourd Art piece.

After cutting out the top of the raw gourd and cleaning it out and sanding the inside smooth,

I took pencil in hand and started to sketch out the designs and circles (panels) with different pictures of Eagles in each panel. I then started wood burning in all boarders and pictures

and after all burning was done, went back to each panel and used all leather dyes to color .

I think I enjoyed doing this one most of all because I honor the Eagle above all other birds of prey. There are 4 Panels in all, each with it's own Eagle Portrait.

Tuesday, November 18, 2008

"Rusty Memories"


1941 Car


Now that I am older, I still have memories of shiny cars of my youth, but here are some Rusty Memories that I now see.

As we get older our memories rust, our bones squeak and creak and even some of our memories fade. With photographs we can still look back on what used to be, go with me on my memory journey and see if you remember these things as I do.


Frontal Shot of 1941 Car


Old Abandoned Homestead


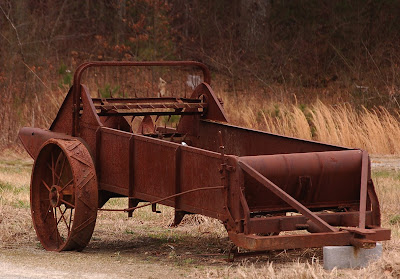
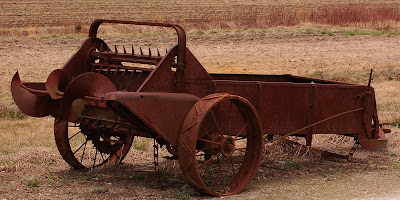
From The Farm.... Old Manure Spreader


A Different View


I hope you enjoy the trip down Memory Lane.

Sunday, November 16, 2008

Passion Flower Twins

This is my entry for "Blogger's Community Photo Challenge"
If you wish to see other entries and vote on them , go to the link I have furnished here.


Passion Flower Twins

Several years ago Elisabeth and I were at a nursery and she spotted a potted Passion Flower plant that was blooming at the time, she and I fell in love with it and she purchased it.


We brought it home and I planted it at one corner of our porch on the log cabin we live in and it began to grow and produce the most beautiful vines and some blooms.


At the end of the season I cut it back to just above the lattice that it was fastened to and waited till the next spring and it came back to life with new growth and wondrous blooms.


The Passion Flower vine has produced new growth every year and I transplanted several sprouts at each post on the porch, four post in all and the vines grew in abundance up each post , spreading out like a web as I trained them to grow along the main beams of the porch roof towards each other and they now meet each other as a curtain of the most amazing beauty with a proliferation of blooms of very beautiful flowers.

I am always amazed at what Creator has made for our viewing enjoyment, and this I am thankful for. I give thanks to Creator each day for the blessings of life and beauty.


Thursday, November 13, 2008

Red Tail Hawk

Red Tail Hawk


I have a Red Tail Hawk friend that I love to see and call too. He used to come around often and I could even walk up under the tree he was sitting in and talk to him and he would listen and look intently at my every word. Something or someone has frightened him sometime within the last three years, for I can no longer walk up anywhere close to him now, so every time I see him in the two main trees here that he sits in I try to get close enough to get a few good pictures of him.

Because of his now shyness I can't get real close to get a good picture, so I purchased a nice 70-300mm lens with VR and can get a fairly decent shot that I can zoom up on and crop in Photo Shop.

I will put a few photographs in of him sitting in the Black Walnut tree first and him flying from there to the big Tulip Popular tree across the road and sitting in it and then flying off.

My lady Elisabeth and I have a good laugh every now and then at his so called Game of eluding me when I get the camera out to take his picture.

The Hawk is one of the hardest birds of prey to photograph because they are very wary of most humans, but my love of Hawks keeps me trying.


Sitting In Black Walnut Tree


Leaving Walnut Tree


Heading For Tulip Popular Tree


Arrived At Tulip Popular Tree


Switching To A Different Branch

Checking Me Out

OK I Am Out Of Here

Gone Hunting

Tuesday, November 11, 2008

"Waste Not Want Not" # 2

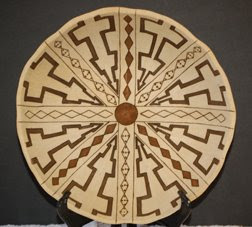
Apache Tray Design

This is another example of what I do with some of the saved pieces of gourd, the idea of waste not want not carried to another level by making a display plate out of it.

After cleaning and sanding down smooth the piece of gourd, the next step is to draw on all the designs with pencil and then wood burn in all the designs followed by coloring all designs with a dark brown leather dye (done with a small brush) and when dry, display on a plate rack.


"Waste Not Want Not"

Apache Tray Design
I had cut the bottom off of a Nigerian Bottle gourd to make a drum and I just could just not bear to throw away such a nice piece of gourd, so I cleaned it and sanded it down smooth and drew on a Apache Tray design and then wood burned in the designs and went back and used light brown leather dye to color in all the details, making it a nice display piece sitting on a plate rack.

I try to make it a policy to never waste anything as much as possible....even to the point of taking a piece of bread and cleaning my plate ( grinning here, because Elisabeth will be bopping me on the head for that.). Sometimes she thinks I carry it to the extremes.

Sunday, November 9, 2008

"Hawk Gourd"


Front View

Panel # 1 (front)
Panel # 2


Panel # 3


Panel # 4

My Love of Hawks and Eagles was my inspiration for this "Hawk Gourd".
I first drew on each hawk with pencil in each of the four panels, then wood burned in each picture and used Leather Dyes for all the colors. I left the area surrounding each Hawk the natural gourd color and stained the rest of the gourd with a light brown leather dye. Also I created a border design which I also wood burned in then colored with leather dye. This gourd does have a top that goes on it, but it seems I forgot to take a picture with the top on...sorry about that (grinning here..just being Human).
Each Hawk is a different kind of Hawk and these four are my favorites.

Saturday, November 8, 2008

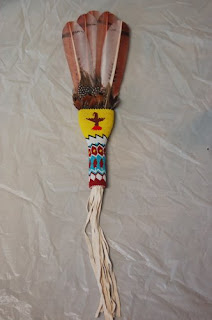
Red Tail Hawk Fan

Front View

Back View


Close Up of Beading


This is another Flat Feather Fan that I just finished today.


I used 10/0 glass seed beads on this fan also and used Red Tail Hawk feathers (painted because you can't sell the Real ones) and beaded the entire handle in patterns of my own design. I used white tanned Deer leather for the trailers on the end of the handle.


The calculated number of beads it took to do this project was also 4,285 beads and it took me Three weeks to bead it and one day to install the feathers.